Using an online Clanview Free account you can “publish” a Clanview 3D family tree from any research software or service that exports family history data to a GEDCOM file – including FamilySearch.
The trick is to get a little help from free RootsMagic Essentials – the tool recommended by FamilySearch to export your family history data to a GEDCOM file.
The result is a published Clanview that overcomes the limitations of traditionally printed family history – no giant printouts, a private online tree you can share instantly, interactive exploring of each user’s direct ancestors – and all independent of the need for each person to install genealogy software or sign-up to a service.
Using RootsMagic with FamilySearch
FamilySearch rated RootsMagic as the software “easiest to sync” with FamilySearch data.
RootsMagic offers a free version for Mac and Windows users. This free version is then synchronised with your existing FamilySearch data simply by importing your existing family tree.
Assuming you already have a FamilySearch account, here’s an overview of what’s involved:
- Install the free RootsMagic software on your computer.
- Import your data from FamilySearch into RootsMagic.
- Export your family history data from RootsMagic to a GEDCOM data file.
Install Free RootsMagic
1 – Let’s assume you are already using a FamilySearch account and have some entered some family tree data.
2 – Download and install the RootsMagic software on your personal computer.
RootsMagic offer a free version called RootsMagic Essentials which is available for both Mac and Windows.
You can download RootsMagic Essentials here: http://rootsmagic.com/Try/RootsMagic/
After downloading, open the file and follow the instructions to install the application.
Import Your FamilySearch Tree into RootsMagic
3 – When RootsMagic Essentials has been installed, open it on your computer. You may be prompted with “RootsMagic News and Updates”, which you can close. You should then see a new window titled “Welcome to RootsMagic”.
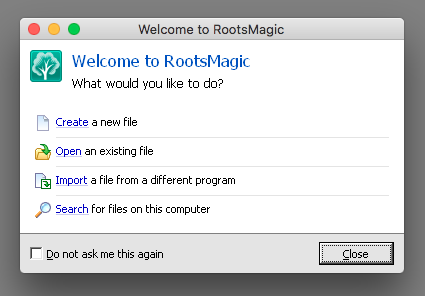
4 – From this window, select “Create a new file”.
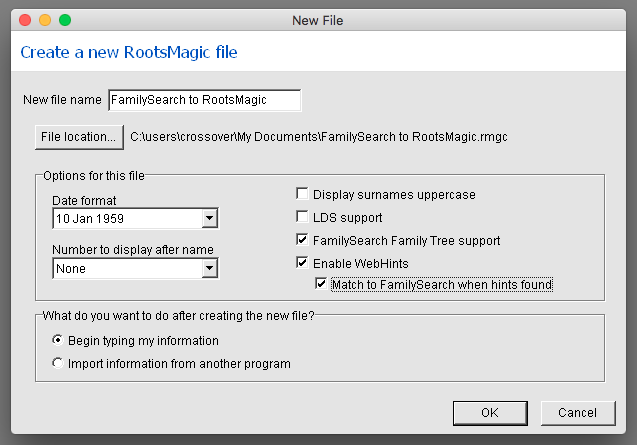
5 – A new window will appear, in which you can name your file and choose a save destination and then click “OK”.
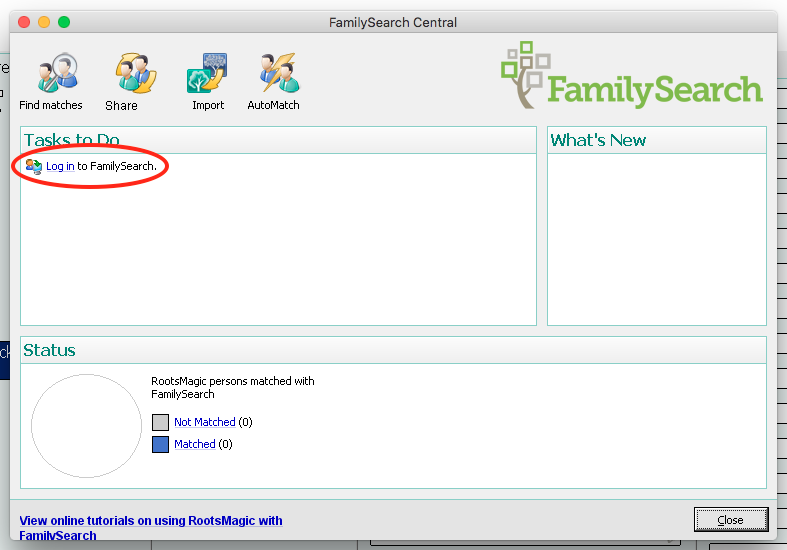
6 – Once you have created your new file, you’ll now need to import your family tree from FamilySearch. To do this, click on the FamilySearch icon in the toolbar.
7 – Log in to FamilySearch via the link provided.
8 – Now that you are logged in, you can import your family tree, using the “Import” button.

9 – A new window will appear in which you can select the number of generations you wish to import.
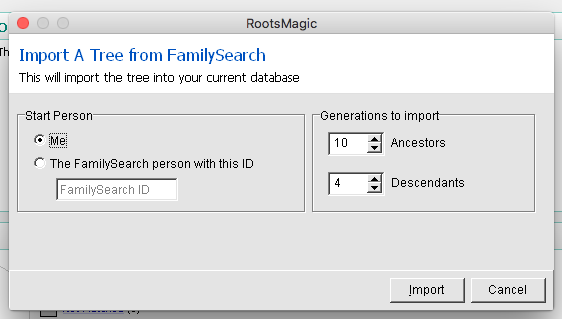
10 – Click on “Import” when you’re ready and your family tree will begin to import from FamilySearch into RootsMagic.

11 – Once the import is complete you can close the “FamilySearch Central” window and you’ll see your family tree displayed on the home screen.
Export Your Tree from RootsMagic to GEDCOM
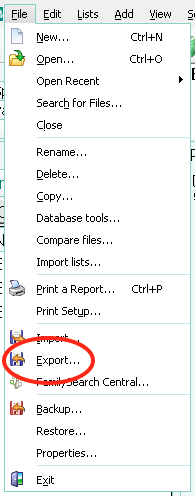
12 – Click on “File” and from the drop down menu, select “Export”.
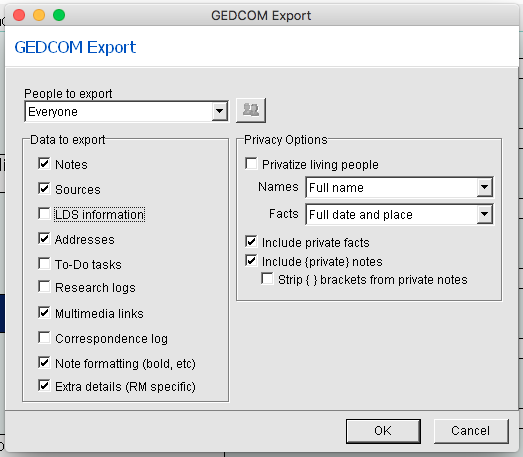
13 – A new window will pop up. Select the data you wish to export as well as privacy options that suit you and click “OK”.
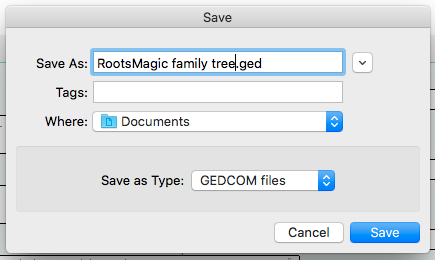
14 – Name your file and choose where you’d like to save it to and click on “Save”.
15 – Now you’re ready to publish your family tree with Clanview so you can share it instantly with family who can explore it independent of any sign-up or software requirements.
If you require any assistance with this process, please contact support@clanview.com and we will be happy to help you.
Need a Video Demonstration?
Looking for some extra guidance? Watch this short video from RootsMagic showing how to import data from FamilySearch into your RootsMagic database.
Ready to publish and share?
Log in to your Clanview Account now and publish your own Clanview 3D family tree today!!
Leave a Reply